Pond Project - Make Your Own Mini Wildlife Pond
Posted on
In the ‘good old days’ of my youth (70s/80s) ponds were a quintessentially British feature, found gracing gardens and village greens alike. I was obsessed with the pond in my grandparents' small garden, so much so that whilst peering in to look at frogspawn I fell in fully clothed.
I jumped out and ran over to my nan crying, accidentally standing on the end of a rake on the way, which then smacked me on the forehead. All very Frank Spencer!
It didn’t deter me from my interest, or they from having a pond, and I continued to watch tadpoles and other pond life with fascination.
Ponds have fallen out of favour for a number of reasons, resulting in there being only around half the number that there used to be. More's the pity as ponds are one of the best sanctuaries for wildlife, with even the smallest pond and pool of water attracting a diverse range of species.
The good news is that this can be easily rectified by creating your own mini pond, which takes up minimal space, costs little or no money, and can easily be made safe for small children. In fact, creating and watching a pond is a fantastic way to introduce children to wildlife. Who doesn’t remember being amazed by pond skaters' ability to walk on water? And what child doesn’t love the living slime that is frogspawn?!
Even the smallest pond will reward you with Pond Snails, Damselflies and Newts.
I decided to create a mini pond from an old butlers sink and below I share with you the simple steps you can take to create a mini pond.
Step 1: Find A Container
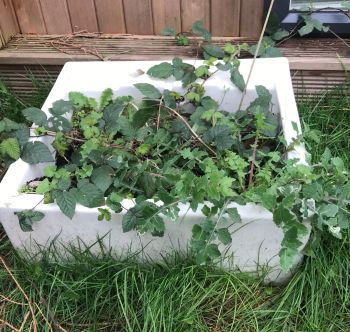
Look to repurpose something that you or a friend/neighbour already has lying around; an old plastic gardening bucket with broken handles, a washing up bowl, lid of an unused dustpin or composter, or as I used, a butlers sink. Skips always seem to be full of plastic trugs, perfect for water-tight ponds!
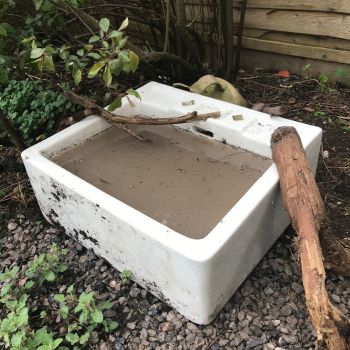
I used an old butlers sink donated by a friend and used over the years for various vegetables and herbs. The brambles had taken hold over winter, so I dug these out and replanted them around the side of the office, as brambles are fantastic for wildlife.
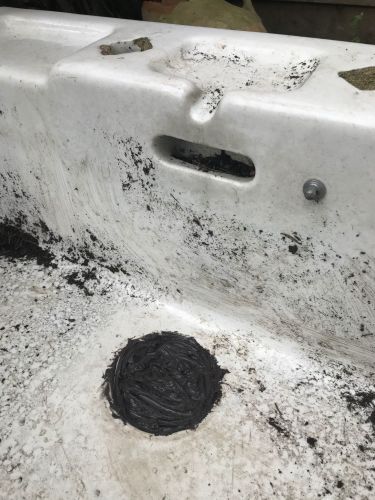
I then sealed up the plug hole with silicon. Brandishing the silicon tube with nozzle was very satisfying and left me feeling very capable and ‘handy’. You should leave to dry for 12 hours, which admittedly I was too impatient to do, much to my husband chagrin! Luckily for me the silicon held when I filled it up the pond with water less than an hour later...but if you can exercise more patience, then please do.
Step 2: Choose The Ideal Position
Place in a spot that gets a decent amount of sun, but not too much direct sunlight. A South facing spot with no shade, or a North facing spot with no sun should be avoided. You are looking for a combination of the two 'part shady'.
The relatively small amount of water in a mini pond will warm up very quickly, giving the creatures living in it an unwelcome hot tub if you're not careful. Equally your pond plants and the wildlife living in it need some sunlight to survive and photosynthesize.
You can either dig a hole in the ground and sink your pond, or sit it on the top of the ground. This may depend on the attractiveness of your selected pond vessel! If you do sink your pond, leave a lip of 1cm proud of the surface so that ground dwelling insects don’t fall in.
If you have young children, place somewhere that is safe for them either out of reach or if you do place low, look to invest in some widely available pond safety netting for the top.
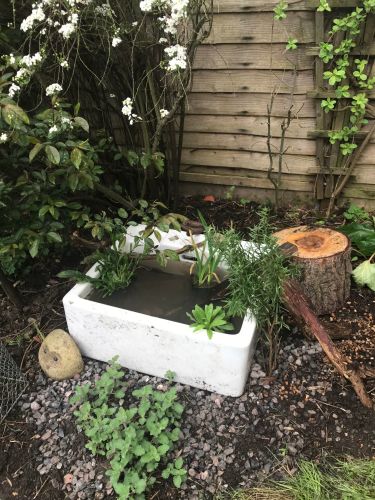
I found a spot of dappled shade and hefted the very heavy sink into the correct position (whilst being sure to engage my core). I used an old piece of concrete slab underneath to make sure that the sink was level-ish.
Step 3: Line The Base Of Your Pond
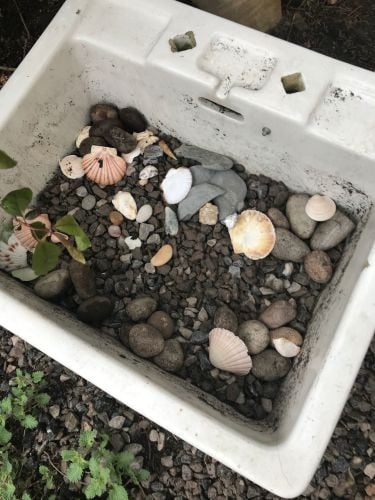
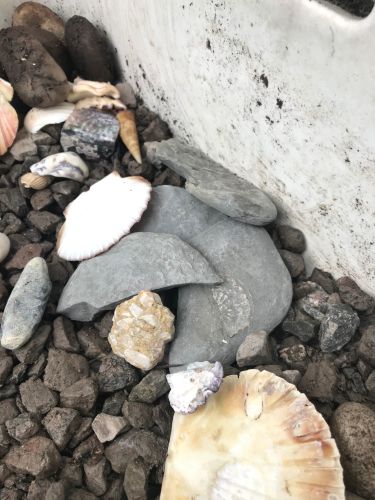
Add some gravel, rocks, shells and any other waste substrate to the base of your mini pond. The idea is to create a variety of habitat for pond dwellers, providing them with a safe hiding place and somewhere in which to lay their eggs.
Before you waste money buying a whole bag of gravel from the Garden Centre, ask around to see if anyone has some left from previous building works. I posted a message on FB and low and behold ended up with plentiful stones, so much so that they were used in the pond, around the pond, and on a new stony bed round the side of the house!
We also had an old bag of shells, some fossil stones collected in Devon on a holiday when the kids were young, and various large pebbles around the garden. These were all grouped together at the bottom of the pond. I took great satisfaction from the de-clutter coupled with putting the items to good use.
Step 4: Fill With Water
The fun bit! If you can, fill your pond with rainwater. Tap water contains chemicals and is less natural, certainly to begin with. If you are adding pebbles from a bag, don't worry about the stone dust that comes inside it. Any dirt will settle at the bottom of the pond and replicate a natural pond more closely.
Step 5: Add Plants
Oxygenating plants like water-milfoil and hornwort can be dropped in, alongside small rushes or plants like marsh marigold and rushes. They will keep the water oxygenated, thus allowing life to exist and thrive.
The plant foliage gives creatures somewhere to climb up and down, hide and lay their eggs. It also gives flying insects a place to rest and a platform to drink from. Not forgetting it will make your pond all the more beautiful.
Oxygenating Pond Plants
-
Canadian Pondweed
-
Willow Moss
-
Rigid Hornwort
-
Slender Club-Rush
-
European Water Clover
-
Common Water Crowfoot
The only pennies I spent were on a few plants for our mini pond; bought from the local aquatic centre. Do take care to check the labels, to ensure you have a combination of plants that grow above and below the water.
You also need to choose those suitable for a small pond. Around 3-4 plants is plenty for a smaller space.
Step 6: Add Logs, Sticks & Maybe Bricks
You’ll need to provide a ramp and perch for wildlife to be able to get into and out of your mini pond. On your next walk in the park look out for some decent branches and logs, so that you can prop them both inside, across, and on the outside of your pond. You can also use old bricks as steps.
Handily, we have a rotting wood pile in the corner of the garden from which I selected a few good specimens! I also added a flat piece of wood as a ramp on the advice of a friend, who told me that hedgehogs are at risk of drowning at this time of year. They emerge from hibernation very thirsty, and thus find their way into ponds and then struggle to climb out. A ramp is just the ticket!
Step 7: Get Carried Away & Redesign The Whole Area Surrounding Your Pond (Optional :-)).
The more cover and interest around your pond, the more interesting wildlife you will attract to it. Plant a combination of insect-friendly plants (read my Gardening For Nature post for more tips on what to plant). You could create a mini wildlife meadow adjacent to your pond by clearing grass, digging over soil and planting some seed. Or just allow the patch of grass closest to your pond to grow out - you will be surprised at the diversity of grasses that grow.
I have gotten as far as digging out and extending the flowerbed leaving me with an unattractive area of bare soil that I need to plant up - my next project!
‘Build it and they shall come’ (or words to that effect :-D). Keep your eyes peeled for frogs, newts, dragonflies, damselflies, birds and a myriad of small pond creatures. What could be simpler or more heartwarming than that?

Add a comment: